A YouTube tutorial, nail gun, MDF, lots of double-checking measurements, wood filler and patience gave us a fantastic panelled hallway for under £150.
And if I can do it, so can you!
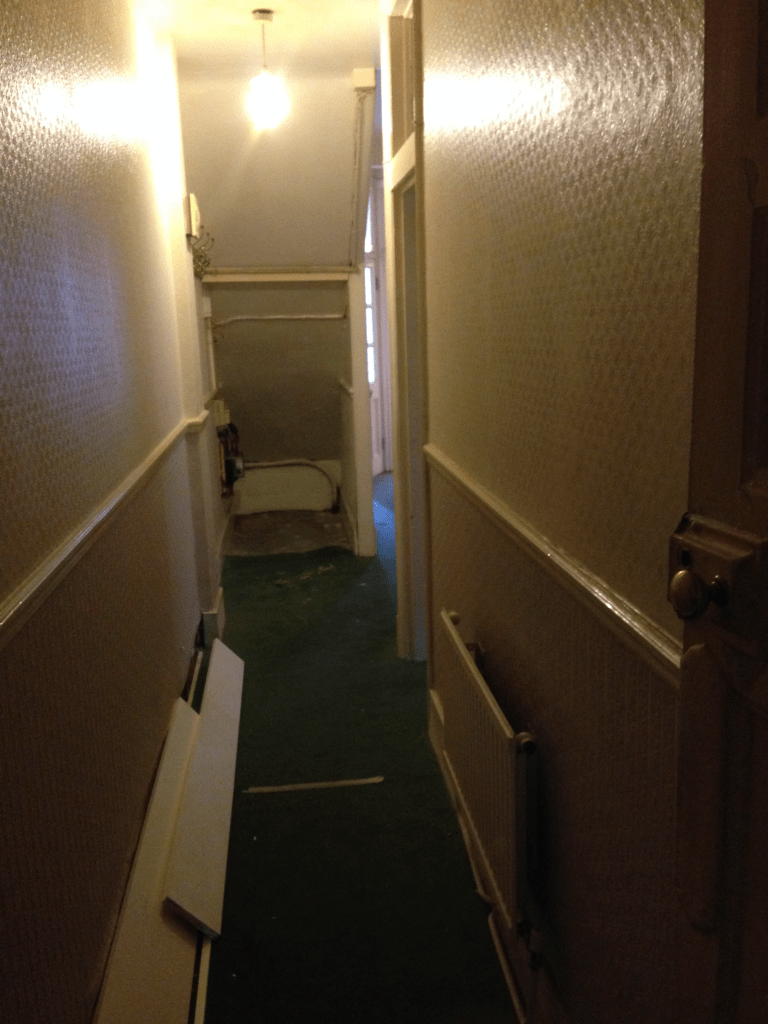
When purchased, our North West London flat was a true fixer-upper. All indicators, including some found letters and newspapers hidden behind the fireplace, lead us to believe it was most likely last decorated in the late 1940s. So it’s been a journey and a pleasure to try our hand at making a beautiful home on a very limited budget.
We took the wallpaper down and the house sort of breathed out and the next day the plaster was pretty much on the floor! Welcome to unexpected house nightmare but it did give us the opportunity to move the radiator without guilt and gave us a blank canvas.
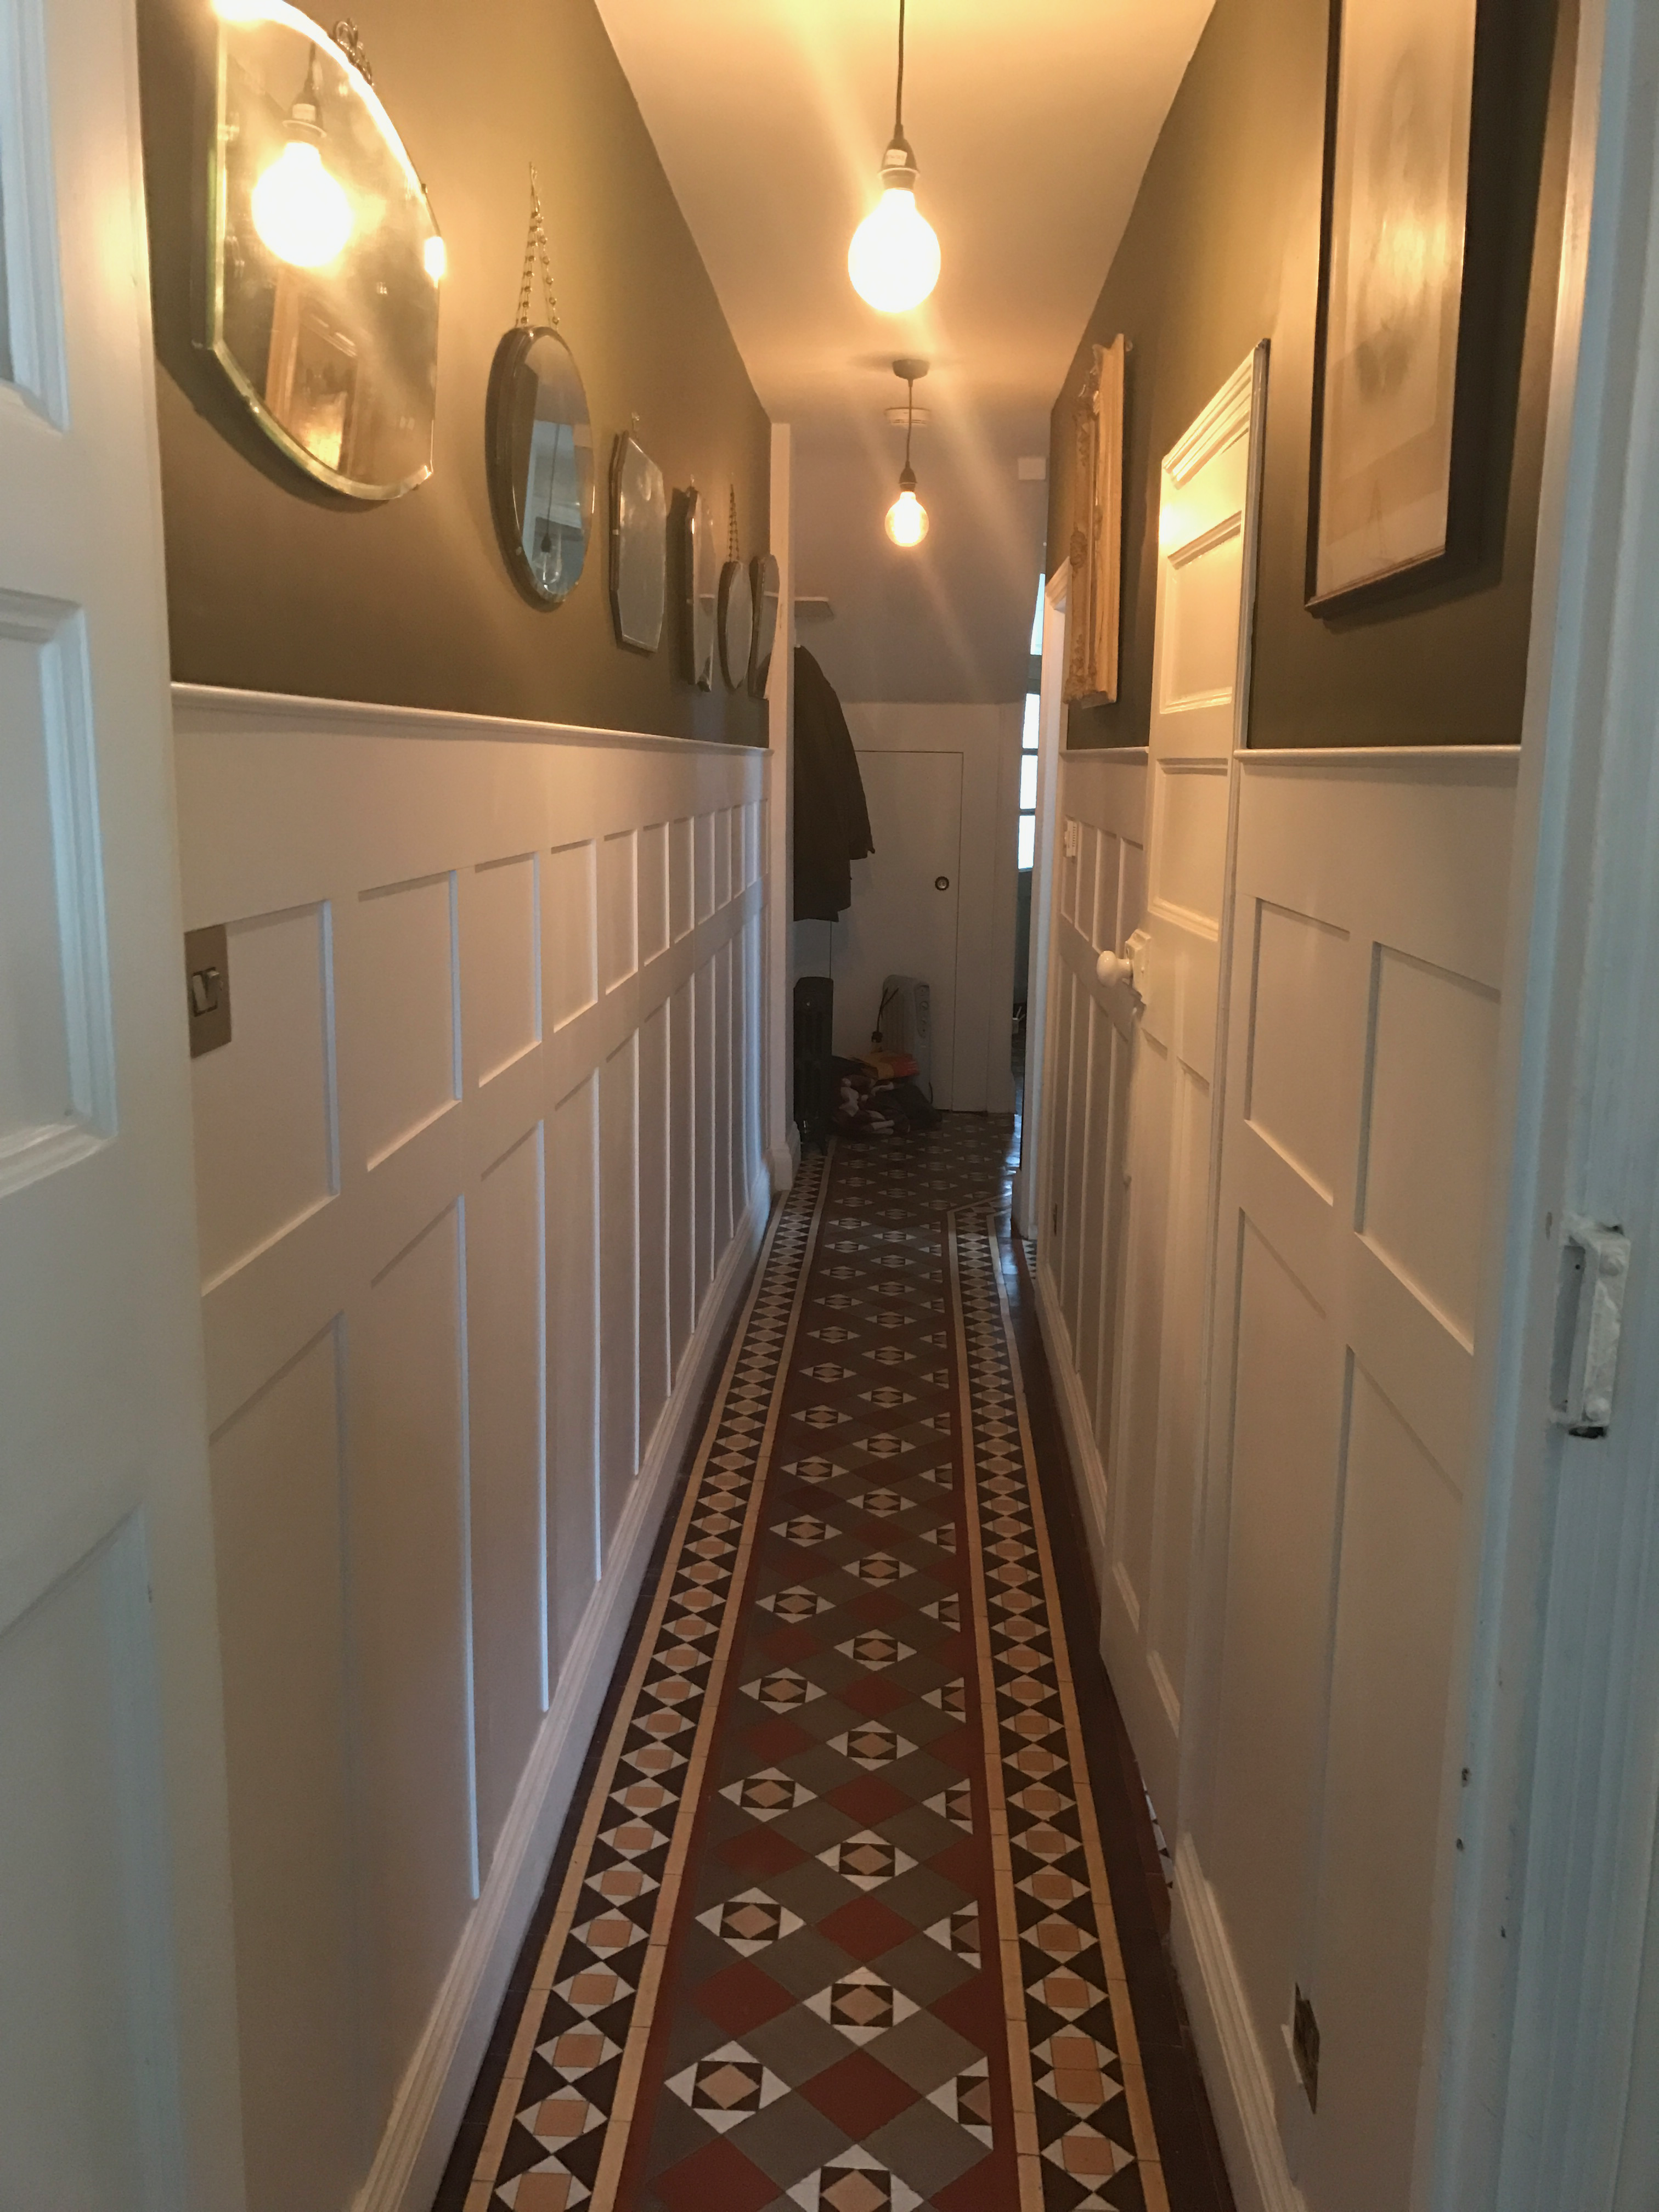
The hallway was my labour of love.
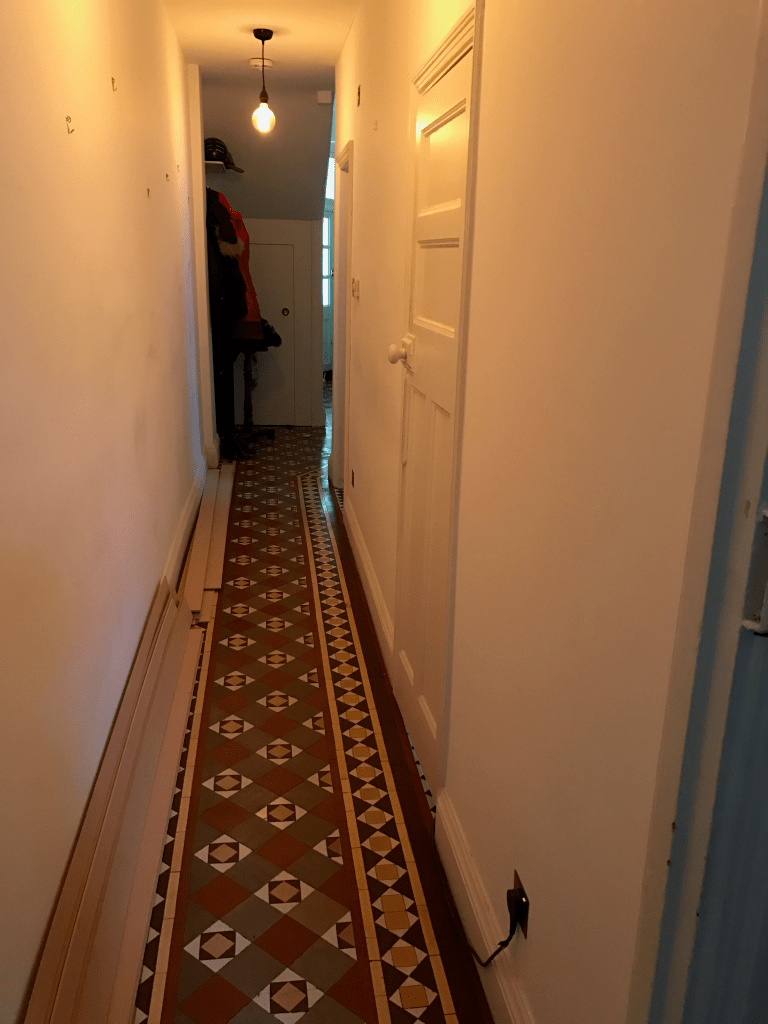
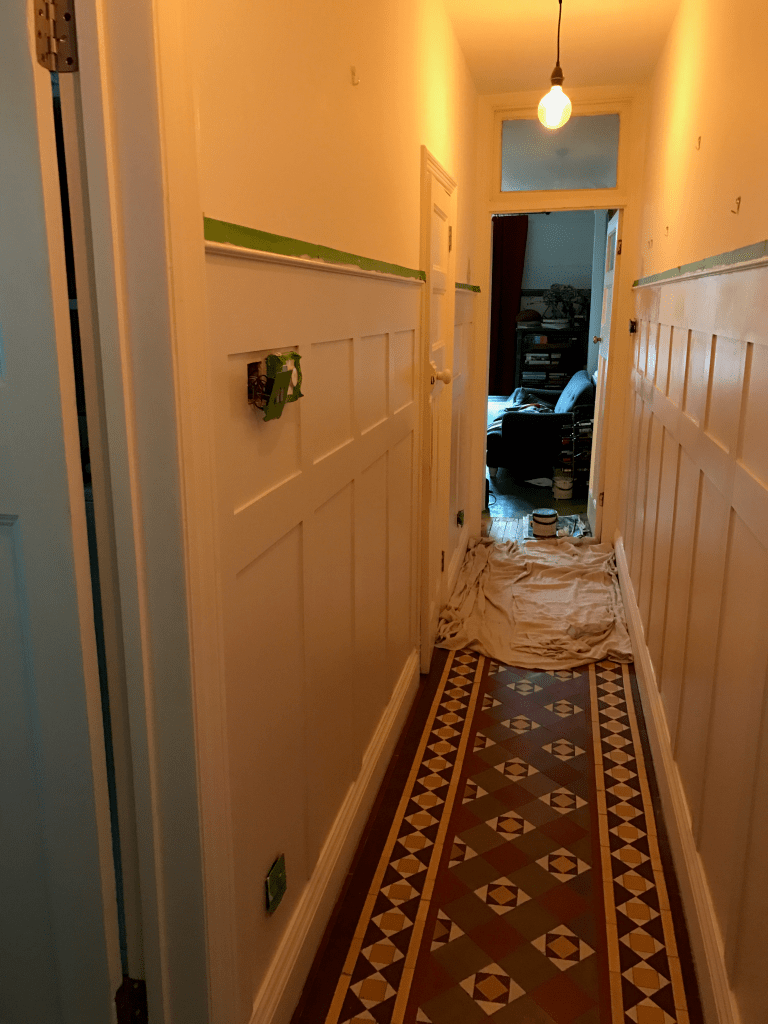
I love panelling, so it was a no brainer that it would be included somewhere. Typical of many victorian flats in this area, we have a very long hallway. Amazingly we discovered the original tiled floor under the carpet, but after the new plaster and ceiling, it was really apparent that the hallway still lacked a bit of personality.
Cue YouTube tutorials
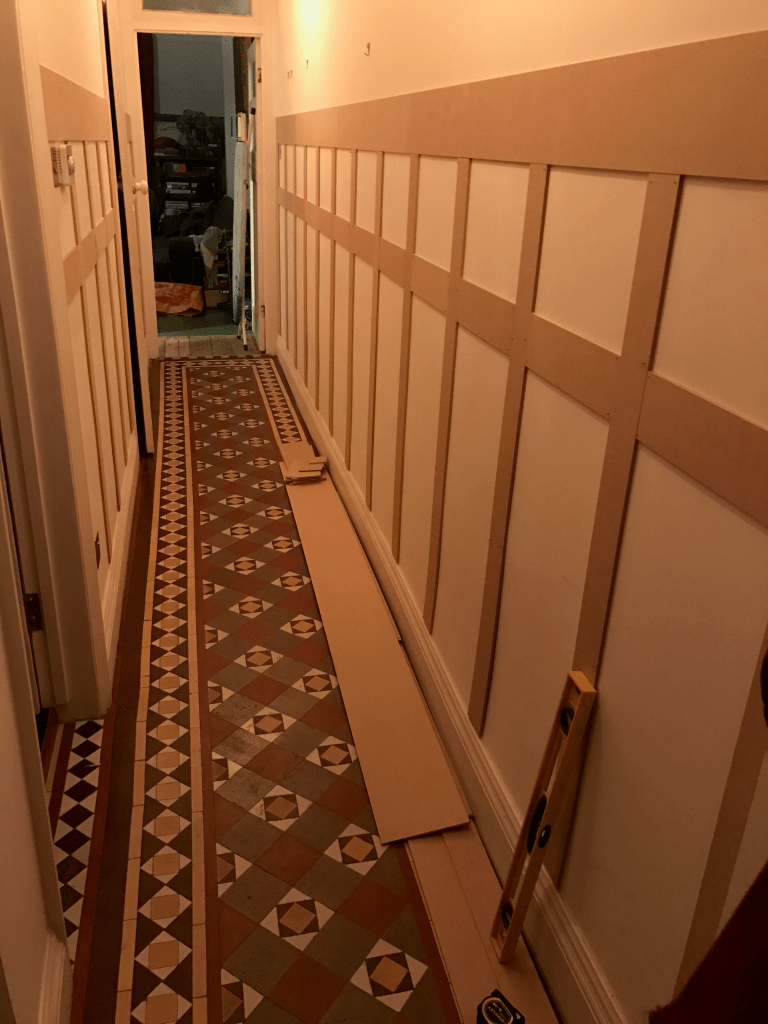
I love what you can find when you google. So after spending a few intense days watching every video I could find, I dived straight into the closest B&Q and purchased two sheets of MDF. Although, I must admit to possibly ruined the B&Q team member’s day when I leveraged their free service to cut them down into a series of strips both to get them in my car and because I seriously don’t have the skill or tools to cut anything that straight at length!
After marking out where everything should be (tip, double check all measurements!), it came down to cutting the strips to size, slotting all the pieces together and nailing them to the wall. Because we had just plastered, the walls were so perfect we didn’t need to board them before decorating. Plus, I have to admit, I chose not to do this just in case it looked awful, and I had to take it down quickly.

Nailing it
Surprisingly, it all went up quickly and was incredibly satisfying. However, I did make one genuinely stupid mistake. I bought some wood filler to pack in all the tiny gaps between the wood and the wall and jumped in with all my fingers. Rooky mistake; I didn’t wear gloves, and I think I may have given myself a bit of a chemical burn as my nails took months to come back correctly. Please, if you take anything away from this, use gloves for this part of the process.
Colour me beautiful
After a few round trip visits to Brewers Decorator Centre on Edgeware Road, grabbing all the wonderful colour cards for all the exciting small and original paint companies they carry I slapped on some samples to see what I could do to complement the original tiled floor.


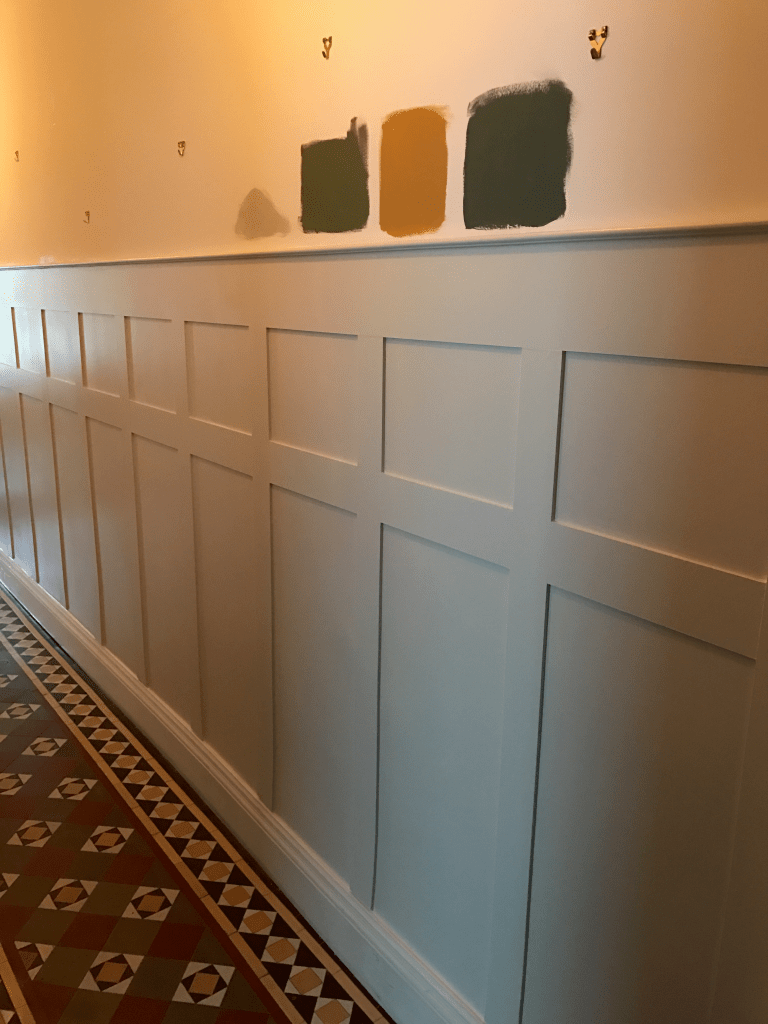

Now I had a lot of advice to paint the panels dark and do a light upper half, but I think I had my American hat on and couldn’t see the panelling being anything but a light colour settling on a strong white from Farrow & Ball with a slight grey undertone.
I also have a collection of mirrors that I’ve picked up over the years which I felt needed something strong for them to pop from. I love these old vintage mirrors; they are all over my house. The shapes are to die for.
I ended up picking a dark green called Messel from Mylands.
If you haven’t heard about Mylands, then you are about to discover something quite special. Mylands Marble Matt is “made using super fine ground marble powder for a natural but hard-wearing finish.” Many claim they are suitable for high traffic areas, but few can live up to the promise when the colour is this high quality. But I can honestly hand on heart confirm that this can be re-touched, wiped, washed or even scrubbed with no effect on colour or sheen. It has been fantastic.
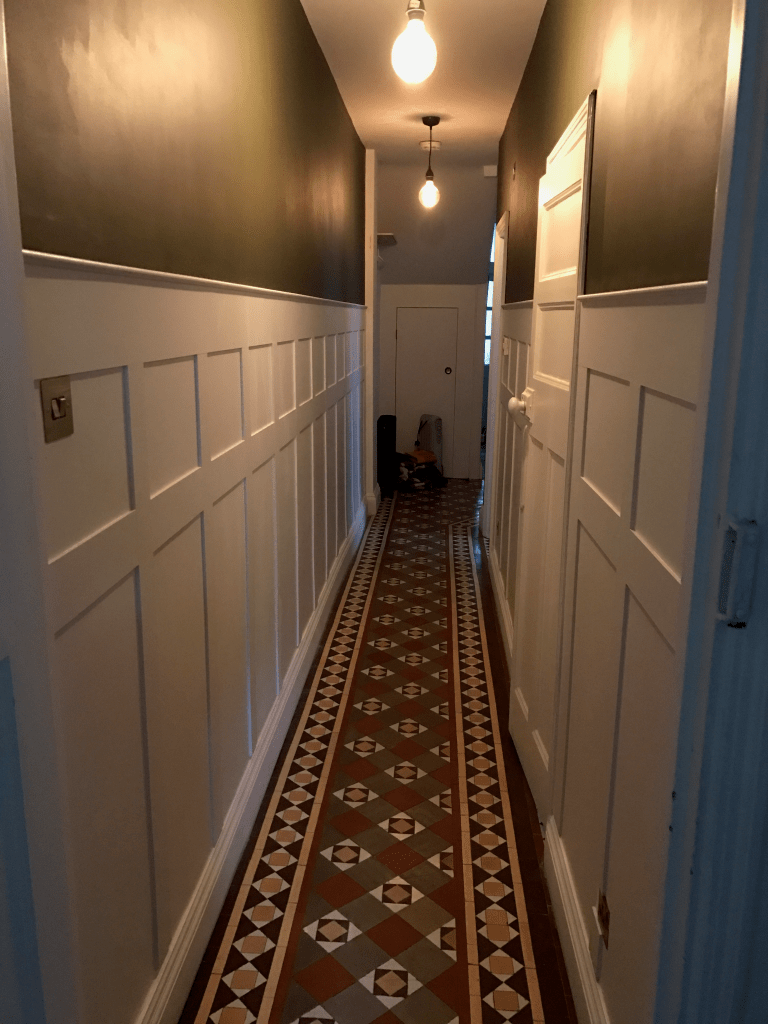
The final result.
I’m so proud of this. It has fundamentally changed the second half of our hallway from just a walkway to get from point A to point B to its own space with its own identity. People actually stop and pause a moment to take it in. What could be better? Now I just have to learn how to not leave tons of junk on the floor when taking a photo…. #reallife.